Angular Material Switch
Angular Material Switch Button: mdSwitch directive is used to create switch button in Angular Material. It is very simple to use this directive. Here in this tutorial we are going to explain how you can create switch button in Angular Material. You can also use our online editor to edit and run the code online.
Angular Material Switch Button | On | Off Example
Let us first create basic switch button using the mdSwitch directive –
Angular Material Switch Button Example:
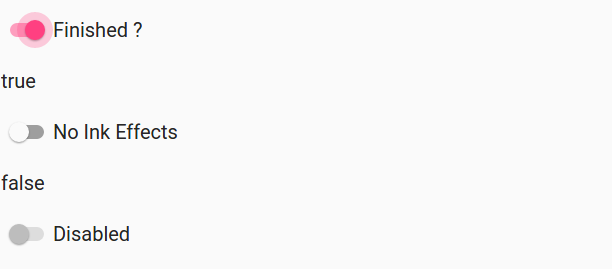
<md-switch ng-model="isActiveModel" aria-label="Finished?">
         Finished ?
	</md-switch>
        {{isActiveModel}}
	<md-switch md-no-ink ng-model="hasInkModel" aria-label="No Ink Effects">
	  No Ink Effects
	</md-switch>
        {{hasInkModel}}

	<md-switch ng-disabled="true" ng-model="isDisabledModel" aria-label="Disabled">
	  Disabled
	</md-switch>
|
| Try It On → |
If you run the above example it will produce output something like this –
Options Available
Following options are available which can help us while dealing with switch buttons-
- * ng-model(string):
Assignable angular expression for data-bind.
name(string):
This is property name of the form.
ng-true-value(expression):
This is the which is set when swith button is selected(true), you can add custom value.
ng-false-value(expression):
This is the which is set when swith button is not selected(false), you can add custom value.
ng-change(string):
Angular expression to be executed when input changes when user interacts it.
ng-disabled(expression):
This is used to enable and disable the switch button based on the expression.
md-no-ink(boolean):
This is for ripple effect enable-disable.
aria-label(string):
Area Lable for user access.
Learn More
Let us have some example and demo about the Angular Material Switch Button.
More examples coming soon…
Advertisements
Add Comment
📖 Read More
- 1. Angular Material Tooltip
- 2. Angular Material Tabs
- 3. Angular Material Toolbar
- 4. Angular Material Toast


