Category Archives: Laravel Tutorial
Laravel Search Functionality
Laravel Search Functionality – The Laravel Search Functionality is used to search the data and display on the view which is matched from the database value.
Laravel Search Functionality | with full Example.
Let us understand how to use search functionality in laravel.
Full example of search functionality.
Now here i am going to explain how to use search functionality step by step.
First we have to create a controller using artisan command like this.
php artisan make:controller SearchController
Controller code:-
Let’s look at a simple example.
orWhere ( 'email', 'LIKE', '%' . $search . '%' )->get (); if (count ( $test ) > 0) return view ( 'search' )->withDetails ( $test )->withQuery ( $search ); else return view ( 'search' )->withMessage ( 'No Details found. Try to search again !' ); } } |
Model code:-
Let’s look at a simple example.
|
|
view code:-
Let's look at a simple example.
@foreach($details as $user) @endforeach
|
Route path:-
Route::get('/find', 'AccountController@find');
Route::post('/findSearch', 'AccountController@findSearch');
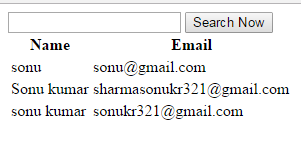
When we search data through name or email in search box. Output will be display like this:-
Laravel login authentication
Laravel login authentication – The Laravel login authentication is used to login the user with same databse value which is registered in database.
Laravel login authentication | with full Example.
Let us understand how to use Laravel login authentication.
Full example of login authentication.
Now here i am going to explain how to login user step by step.
First we have to create a controller using artisan command like this.
php artisan make:controller authe
Controller code:-
Let’s look at a simple example.
name = Input::get("name");
		$user->password = md5(Input::get("password"));
		$user->email = Input::get("email");
		$user->number = Input::get("number");
		$user->date_of_birth = Input::get("date_of_birth");
		$user->save();

		$request->session()->flash('flash_message', 'Inserted Successfully!');
		return redirect('index');
	}

	public function adminLogin()
	{
		return view ('adminLogin');
	}

	public function Login(Request $request, $id=null)
	{
	 $test = new TestModel;
	 $email = $request->input('email');
	 $password = $request->input('password');
	 $matchThese = ["email"=>$email, "password"=>md5($password)];
	 $results = TestModel::where($matchThese)->get();

	 return view('profile', ['results' => $results]);
	}
}
|
Then create a model page:-
Let’s look at a simple example.
|
|
View page:-
Let's look at a simple example.
@if (count($errors) > 0)
|
Route path:-
Route::get('/adminLogin', 'AccountController@adminLogin');
Route::post('/Login', 'AccountController@Login');
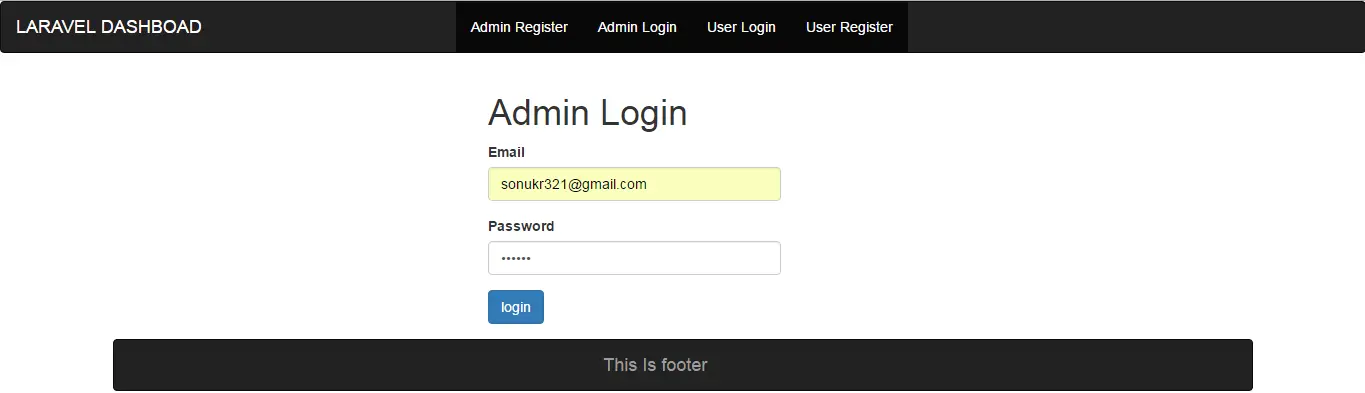
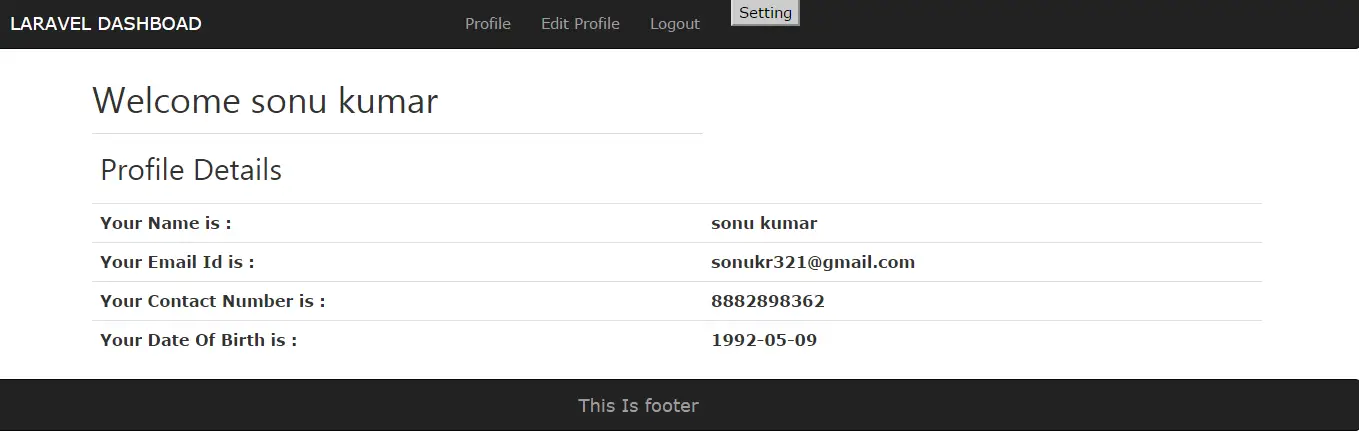
After click the login button we will see the user will be successfully logged in and show the user details:-
Laravel drop column if exists
Laravel drop column if exists – We can use migration to drop column if exists using the artisan command. Here in this tutorial we are going to explain how you can drop column in Laravel.
Laravel drop column if exists Using Migration | with full Example.
Let us understand how to drop drop column if exists Using Migration.
Full example of drop column using migration.
Now here i am going to explain how to drop column step by step.
Migration File:-
Let’s look at a simple example.
increments('id');
            $table->string('name');
            $table->string('email')->unique();
            $table->string('password');
            $table->rememberToken();
            $table->timestamps();

        });
    }
     public function down()
    {
        if (Schema::hasColumn('users', 'name'))
        {
            Schema::table('users', function (Blueprint $table)
            {
                $table->dropColumn('name');
            });
        }
    }
}
|
Finally run the migration using command prompt.
php artisan migrate:rollback
Laravel drop foreign key constraint
Laravel drop foreign key constraint – We can use migration to drop foreign key constraint using the artisan command. Here in this tutorial we are going to explain how you can drop foreign key constraint in Laravel.
Laravel drop foreign key constraint Using Migration | with full Example.
Let us understand how to drop foreign key constraint Using Migration.
Full example of drop foreign key using migration.
Now here i am going to explain how to drop foreign key step by step.
Migration File:-
Let’s look at a simple example.
increments('id');
            $table->integer('user_id');
            $table->string('title');
            $table->string('slug')->unique();
            $table->timestamps();
            $table->foreign('user_id')->references('id')->on('users')->onDelete('cascade');
        });
    }

    public function down()
    {
	    Schema::table('songs', function(Blueprint $table) {
            $table->dropForeign('user_id');

        });
    }
}
|
Run this migration through artisan command for create a database.
php artisan migrate
For delete:-
php artisan migrate:rollback
Laravel delete image from folder
Laravel delete image from folder – The Laravel delete image from folder is used to delete image from the specific directory.
Laravel delete image from folder | with full Example.
Let us understand how to delete image from the folder.
Full example of delete image from the folder.
Now here i am going to explain how to delete image step by step.
First we need to create a DeleteImageController.php in controller directory.
Let’s look at a simple example.
delete();
      Session::flash('flash_message', 'Successfully deleted the image!');
      return Redirect::to('page name');
      }
  }
}
|
Route Path:-
Route::get('/deleteImage','DeleteImageController@destroy');
Laravel Drop Table Using Migration
Laravel Drop Table Using Migration – We can use migration to drop the database table using the artisan command. Here in this tutorial we are going to explain how you can drop database table in Laravel.
Laravel Drop Table Using Migration | with full Example.
Let us understand how to use Laravel Drop Table Using Migration.
Full example of delete table using migration.
Now here i am going to explain how to delete table step by step.
As we discussed in previous post to create a table using migration now i am going to show how to delete table using artisan command.
Migration File:-
Migration file:-
Let’s look at a simple example.
increments('id');
            $table->string('name');
            $table->string('email');
            $table->string('password');
            $table->rememberToken();
            $table->timestamps();
        });
    }

    public function down()
    {
        Schema::dropIfExists('sonu1');
    }
}
|
Then run some command in command prompt:-
php artisan migrate:rollback
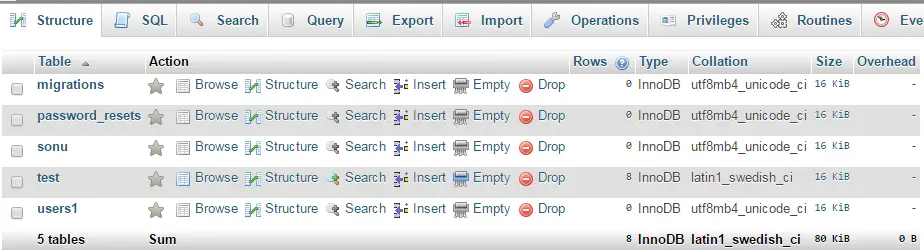
Then we can see table will be deleted from database.
Before deleted
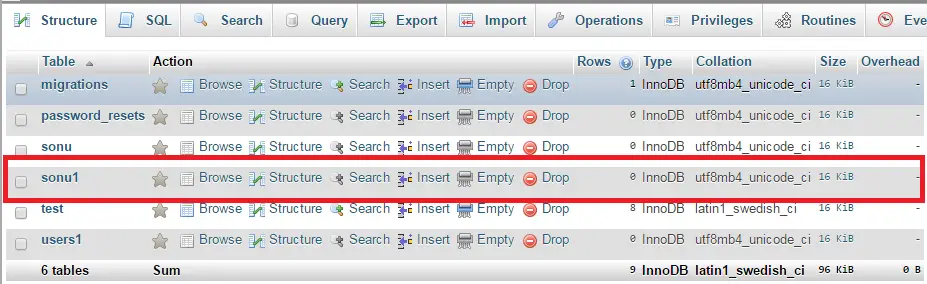
After deleted
Laravel Rename Table Column
Laravel Rename Table Column – The Laravel Rename Table Column is used to rename the table column.
Laravel Rename Table Column Using Migration | with full Example.
Let us understand how to use Laravel Rename Table Column Using Migration.
Full example of rename table column using migration.
Now here i am going to explain how to rename table column step by step.
First we have to create migration using artisan command like this.
php artisan make:migration create_Data_Table
Then we have to include Doctrine\DBAL into our project.
composer require doctrine/dbal

After successfull installation we can easily rename the table column like this:-
Migration File:-
Let’s look at a simple example.
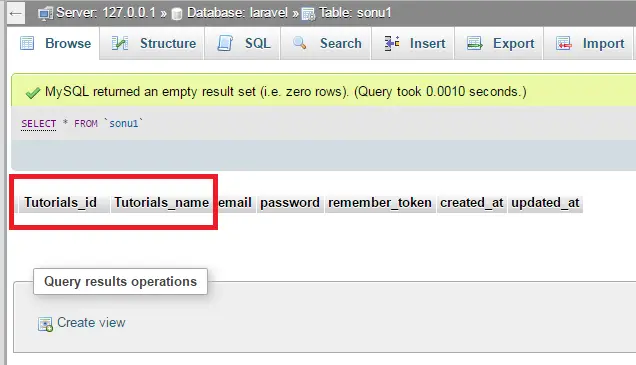
renameColumn('id', 'Tutorials_id');
            $table->renameColumn('name', 'Tutorials_name');

        });
    }
public function down()
    {
        Schema::dropIfExists('sonu1');
    }
}
|
Finally run this migration through artisan command.
php artisan migrate create_Data_Table
Then you can see in your database table, column will be renamed.
Laravel Create Table Using Migration
Laravel Create Table Using Migration – The Laravel Create Table Using Migration is used to create a database table using migration from artisan command.
Laravel Create Table Using Migration | with full Example.
Let us understand how to use Laravel Create Table Using Migration.
Full example of create table using migration.
Now here i am going to explain how to create table step by step.
First we have to create migration using artisan command like this.
php artisan make:migration createDataTable
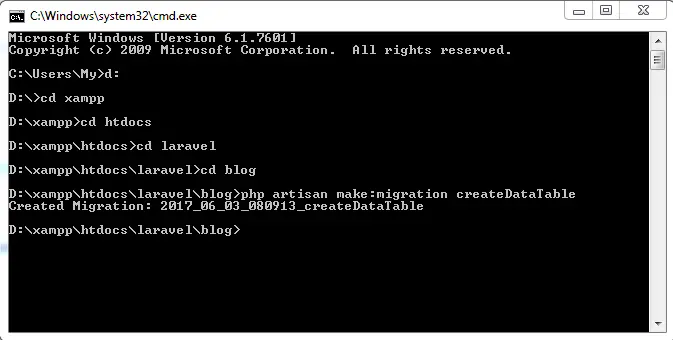
After run this command we can check migration automatically created at databse/migration/fileName.
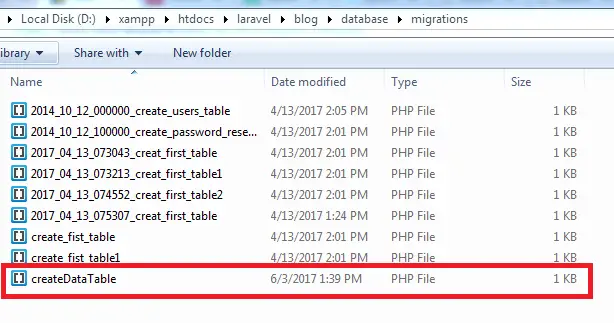
Migration file:-
Let’s look at a simple example.
increments('id');
            $table->string('name');
            $table->string('email');
            $table->string('password');
            $table->rememberToken();
            $table->timestamps();
        });
    }

    public function down()
    {
        Schema::dropIfExists('users');
    }
}
|
Then Run the migrate command in command prompt:-
php artisan migrate
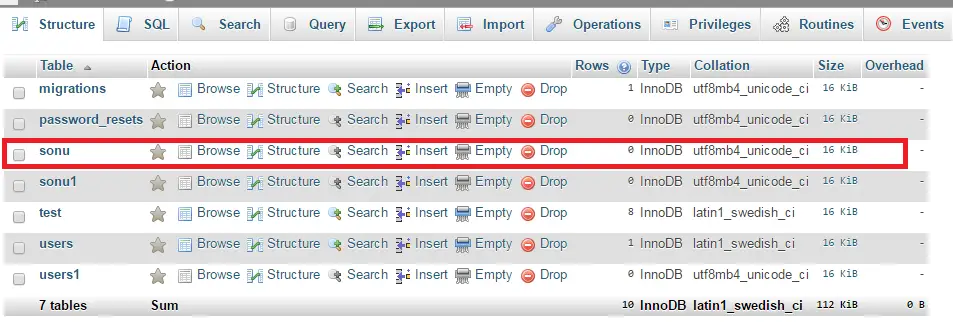
Now we can see table will be created in your database.
Laravel rename file while uploading
Laravel rename file while uploading – The Laravel rename file while uploading is used to rename the file or image during uploading.
Laravel rename file while uploading | with full Example.
Let us understand how to use Laravel rename file while uploading.
Full example of rename file while uploading.
Now here i am going to explain how to rename file during uploading.
Create a controller page and save as [RenameController.php].
Let’s look at a simple example.
move($destinationPath, $filename); echo "Uploaded |
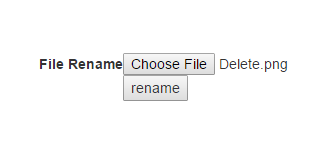
Then create a view page and save as [Rename.blade.php]
Let’s look at a simple example.
|
Route Path:-
Route::get('/RenameDisplay','RenameController@renameDisplay');
Route::post('/rename','RenameController@renameFile');
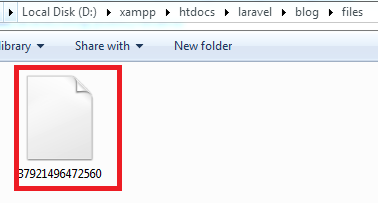
Storage Folder:-