Materialize Tooltips
Materialize Tooltips: Tooltips are basically used to provide the extra information about the elements. It is very easy to create Tooltips in Materialize framework. Here in this tutorial we are going to explain how you can create and use the tooltips in Materialize. You can also use our online editor to edit and run the code online.
Materialize Tooltips Example
To Add Tooltip first Create a button and Add class tooltipped, attribute data-position=”bottom”,data-delay=”50″ and data-tooltip=”This is Dummy Tooltip” simply as below-
Materialize Tooltips Example:
<a class="btn tooltipped" data-position="bottom" data-delay="50" data-tooltip="This is Dummy Tooltip">Hover Me!</a> |
In the above example we have create a simple tooltip for a button. If you run the above example it will create output something like this-

Options
Following options are available in Materialize Tooltip-
- delay: Delay time before tooltip appears, Default is 350 ms.
- tooltip: Text to display on hover. It can be HTML if you have set html to true.
- position: This is used to set the position of the tooltip- it can be top, left, bottom, right. Default position is bottom.
- html: This is used to set true to display the html content in tooltip. Default is false.
Remove Tooltip
You can remove tooltip using jQuery simply as below –
Materialize Remove Tooltip Script
<script>
$(selector).tooltip('remove');
</script>
|
Where selector can be id, class of the button.
Learn More
Let us have some More example and demo about Materialize Tooltips.
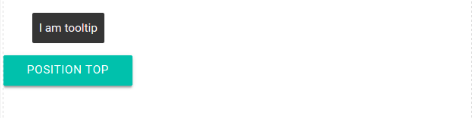
Tooltip Position : Top
data-position=”top” is used to place the Tooltip at top –
Materialize Tooltip Position Top Example
<script> <a class="btn tooltipped" data-position="top" data-delay="50" data-tooltip="I am tooltip">Position Top</a> </script> |
If you run the above example it will give following output-
Tooltip Position : Left
data-position=”left” is used to place the Tooltip at Left –
Materialize Tooltip Position Left Example
<script> <a class="btn tooltipped" data-position="left" data-delay="50" data-tooltip="I am tooltip">Position Left</a> </script> |
If you run the above example it will give following output-
![]()
Tooltip Position : Bottom
data-position=”bottom” is used to place the Tooltip at Bottom –
Materialize Tooltip Position Bottom Example
<script> <a class="btn tooltipped" data-position="bottom" data-delay="50" data-tooltip="I am tooltip">Position Bottom</a> </script> |
If you run the above example it will give following output-

Tooltip Position : Right
data-position=”right” is used to place the Tooltip at Right –
Materialize Tooltip Position Right Example
<script> <a class="btn tooltipped" data-position="right" data-delay="50" data-tooltip="I am tooltip">Position Right</a> </script> |
If you run the above example it will give following output-
![]()
Advertisements


