Materialize Select
Materialize Select Dropdown : Select allows user to select one or more options from the dropdown. To create select box in materialize just wrap the select options with the div having class input-field, and initialize it in JavaScript. Here in this tutorial we are going to explain how you can use materialize pre-defined classes to create dropdown options.
You can also use our online editor to edit and run the code online.
Materialize Select Box Example
Let us create a simple select dropdown in materialize framework-
Materialize Select Dropdown | Select Box | Example:
<div class="input-field col s6">
    <select>
      <option value="" disabled selected>Select An option</option>
      <option value="1">Item 1</option>
      <option value="2">Item 2</option>
      <option value="3">Item 3</option>
      <option value="4">Item 4</option>
      <option value="5">Item 5</option>
    </select>
    <label>Materialize Select Option</label>
  </div>
  <script>
  $(document).ready(function() {
    $('select').material_select();
  });
  </script>
|
Note– This is jQuery Plugin so don’t forget to initialize it.
If you run the above example it will produce the output something like this –

Muliple Select
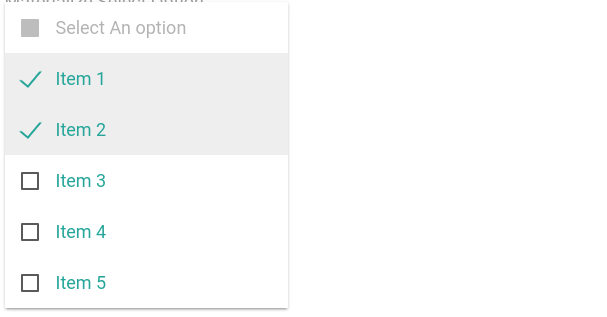
To create Muli selct in Materialize just add the class multiple to the select tag simply as below –
Materialize Muliple Select Example
   <div class="row">
   <div class="col input-field col s6" style>
    <select multiple>
      <option value="" disabled selected>Select An option</option>
      <option value="1">Item 1</option>
      <option value="2">Item 2</option>
      <option value="3">Item 3</option>
      <option value="4">Item 4</option>
      <option value="5">Item 5</option>
    </select>
    <label>Materialize Select Option</label>
  </div>
</div>
 <script>
  $(document).ready(function() {
    $('select').material_select();
  });
  </script>
|
If you run the above example it will produce the output something like this –
Add Icons | Images To Select Options | Left | Right
The attribute data-icon is used to add icons or images to the options, you can add position left or right for the icon or images. If you want to add circle images then add class circle to the image. Here is a simple example of select dropdown with icons & images –
Materialize Muliple Select Example
   <div class="row">
   <div class="col input-field col s6" style>
    <select multiple>
      <option value="" disabled selected>Select An option</option>
      <option value="1" data-icon="https://www.tutorialsplane.com/wp-content/uploads/2016/12/profile.000.jpg" class="circle">Item 1</option>
      <option value="2">Item 2</option>
      <option value="3">Item 3</option>
      <option value="4">Item 4</option>
      <option value="5">Item 5</option>
    </select>
    <label>Select Option With Image Right</label>
  </div>
</div>
 <div class="row">
   <div class="col input-field col s6" style>
    <select multiple>
      <option value="" disabled selected>Select An option</option>
      <option value="1" data-icon="https://www.tutorialsplane.com/wp-content/uploads/2016/12/profile.000.jpg" class="left circle">Item 1</option>
      <option value="2">Item 2</option>
      <option value="3">Item 3</option>
      <option value="4">Item 4</option>
      <option value="5">Item 5</option>
    </select>
    <label>Select Option With Image Left </label>
  </div>
</div>
 <script>
  $(document).ready(function() {
    $('select').material_select();
  });
  </script>
|
Disabled Select Dropdown
To make select dropdown disable just add the class disabled to select element simply as below-
Disabled Select Dropdown Example
   <div class="row">
   <div class="col input-field col s6" style>
    <select disabled>
      <option value="" disabled selected>Select An option</option>
      <option value="1" class="circle">Item 1</option>
      <option value="2">Item 2</option>
      <option value="3">Item 3</option>
      <option value="4">Item 4</option>
      <option value="5">Item 5</option>
    </select>
    <label>Disabled Select Dropdown </label>
  </div>
</div>
 <script>
  $(document).ready(function() {
    $('select').material_select();
  });
  </script>
|
If you run the above example it will produce the output something like this –

Update | Destroy Select Dropdown
Sometimes we need to update or destroy the select dropdown in materialize which can be done simply as in below example-
Update | Destroy Select Box jQuery Example
 <script>
  $(document).ready(function() {
    $('select').material_select('destroy');
  });
  </script>
|
Advertisements


