Category Archives: Materialized
Materialize Date Picker
Materialize Date Picker : Date Picker is an important component of any framework which enables us to select the date from the calendar. Materialize provides a script to create cool date picker which can be easily integrated anywhere. Here in this tutorial, we are going to explain how you can use date picker script in Materialize Css. You can also use our online editor to edit and run the code online.
Materialize Date Picker | Time Picker| Calender | Format | Options | MaterializeCss Example
Let us create a simple date picker in Materialize. There are basically two parts first html and second JavaScript, in html part just create an input type date and add a class name to this, JavaScript part contains the calendar initialization part. Here is complete example of Date Picker –
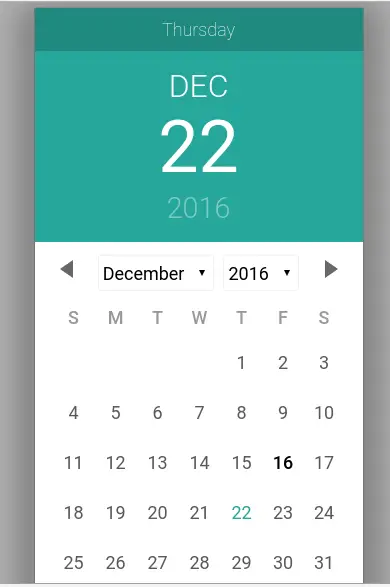
If you run the above example it will produce output something like this –
:
Date Format
If you want to set or change the date format, you can do this by passing format:’dd/mm/yyyy’ option simply as below-
Options Format
Following options / Format are available for configuration of Date Picker.
- selectMonths(Boolean): It is used to Create a dropdown to control month.You can pass true to control month.
- format(dateFormat)– Use this parameter to set the date Format example – format: ‘d/mm/yyyy’.
- today(String)– This is used to set Today Button Text Label.
- clear(String)– Clear Button Label Text.
- close(String)– Close Button Label Text.
- closeOnSelect(Boolean)– Pass true if you want to close datepicker automatically once user selects date.
selectYears(Number): Creates a dropdown of years to control year example – selectYears(15) this will allow to control 15 years on calender.
Time Picker
You can initialize timepicker using class on input field. Here is an example of timepicker in Materialize Css.
Date Picker Format In Materialize Caleneder:
|
|
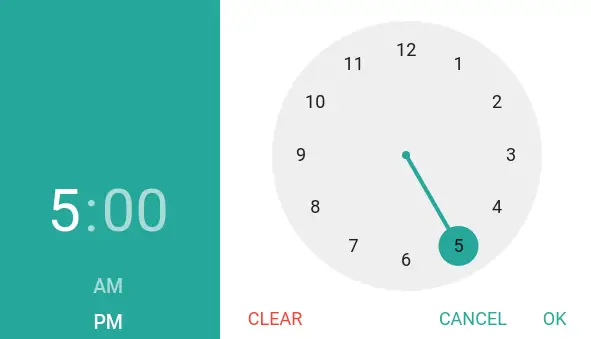
Materialize timepicker looks like this-
Materialize Switches
Materialize Switches : Switches are basically used to show the On/Off state. Materialize uses checkboxes for switches it sets checkbox’s value to 1 when we click on “on” level, and it sets checkbox’s value to 0 when we click on “Off” level. It is very simple to create switches in Materialize framework. Here in tutorial we are going to explain how you can create switches in Materialize. You can also use our online editor to edit and run the code online.
Materialize Switches Example
Let us first create a very basic and simple switch. First create a div with class=”switch” and then add label tag and inside the label tag add input type=”checkbox” and a span with class=”lever”.
If you run the above example it will produce output something like this –
Materialize Checkboxes
Materialize Checkboxes : Checkboxes are used to enable users to select one or more than options from the given options. Materialize provides classes to create checkboxes with cool look and feel. Here in this tutorial we are going to explain how you can create checkboxes in Materialize framework. You can also use our online editor to edit and run the code online.
Materialize Checkboxes Example
Let create a very basic and default checkbox in Materialize –
If you run the above example it will produce the output something like this –
Learn More
Let us have some More example and demo about the Matrialize Checkboxes.
Filled In Checkbox
Class filled-in is used to create filled in Checkbox. Here is an example of filled in checkbox –
The above example will give output something like this –
![]()
Disabled Checkbox
To create disabled checkbox just add disabled=”disabled” simply as below –
If you run the above example it will produce output something like this –
![]()
Materialize Radio Button
Materialize Radio Button: Radio button are basically used to select one option from the given option. It is very simple to create radio button in materialize framework. Here in this tutorial we are going to explain how you can create radio buttons in materialize. You can also use our online demo run and see the output.
Materialize Radio Button Example
Let us create simple radio buttons-
In the above example we have created simple radio button which allows user to select gender from the male and female option. If you run the above example it will produce output something like this –

Radio Buttons With Gap
If you want to add gap inside the radio button, just add class=”with-gap” to the radio button. Here a simple example of radio buttons with gap-
If you run the above example it will produce the output of radio buttons with gap as below-

Materialize Select
Materialize Select Dropdown : Select allows user to select one or more options from the dropdown. To create select box in materialize just wrap the select options with the div having class input-field, and initialize it in JavaScript. Here in this tutorial we are going to explain how you can use materialize pre-defined classes to create dropdown options.
You can also use our online editor to edit and run the code online.
Materialize Select Box Example
Let us create a simple select dropdown in materialize framework-
Note– This is jQuery Plugin so don’t forget to initialize it.
If you run the above example it will produce the output something like this –

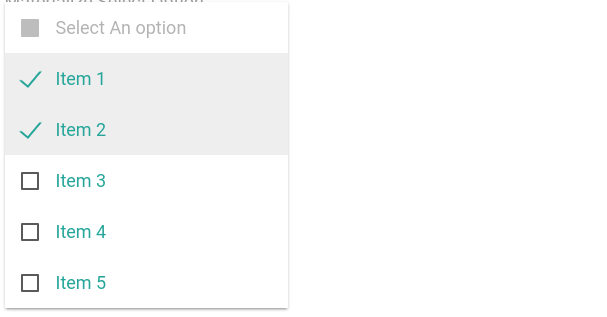
Muliple Select
To create Muli selct in Materialize just add the class multiple to the select tag simply as below –
If you run the above example it will produce the output something like this –
Add Icons | Images To Select Options | Left | Right
The attribute data-icon is used to add icons or images to the options, you can add position left or right for the icon or images. If you want to add circle images then add class circle to the image. Here is a simple example of select dropdown with icons & images –
Disabled Select Dropdown
To make select dropdown disable just add the class disabled to select element simply as below-
If you run the above example it will produce the output something like this –

Update | Destroy Select Dropdown
Sometimes we need to update or destroy the select dropdown in materialize which can be done simply as in below example-
Update | Destroy Select Box jQuery Example
|
|
Materialize Forms
Materialize Forms– Forms are basically used to get the user input. Materialize provides the various form input with smooth transition and smoothness. Here in this tutorial we are going to explain how you can create materialize forms. You can also use our online editor to edit and run the code online.
Materialize Forms Example
Materialize provides inbuilt classes to create form inputs, to show error/success messages, adding icons, changing colors and to add date pickers etc. Let us go step by step to understand the materialize
form inputs and elements.
Input Fields
Input fields are basically used to accept the user inputs. To create input field in Materialize wrap the input and label with div having class .input-field. In case of HTML 5 validation It adds the valid and invalid class as per the validation.
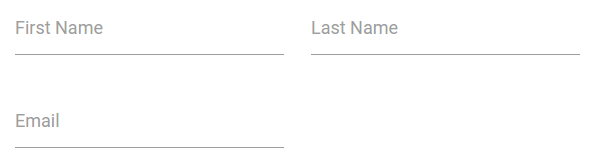
Now let us create a simple example form containing the basic form input fields.
Note : If you don’t want the red/green validation states remove the validate from the form inputs.
If you run the above example it will produce the output something like this –
Prefilling Text Inputs
Sometimes we need to add some default(Prefilled) value in input field, you can do this by simply adding value attribute. Here is an example of Prefilling Text –
If you run the above example it will produce the output something like this –

Icon Prefixes | Add Icons To Input Field
Just add a icon before the form input field and add prefix class. Here is an example of Adding icons to input field in Materialize –
You can add –
If you run the above example it will produce the output something like this –

Materialize Textarea
Add class materialize-textarea to textarea and wrap this textarea with a div having class input-field simply as below –
If you run the above example it will produce the textarea with materialize effects.
Learn More
Let us have some More example and demo about the Materialize Forms.
Custom Error | Success Messages
Sometimes we need customization in error or success messages, we can add custom error or success messges by simply adding the attribute
data-error and data-success to input labels. Here is an example of Custom error and messages –
If you run the above example it will produce the output something like this –

Materialize Footer
Materialize Footer – Footer is an important part of any website, it contains useful information and navigation. Here in this tutorial we are going to explain how you can create Footer in Materialize. You can also use our online editor to edit and run the code online.
Materialize Footer Example
Let us create a simple footer in Materialize-
If you run the above example it will produce output something like this –

Sticky Footer
Sometimes we need sticky footer which always stays on the bottom of the page. To create the sticky footer add the following css –
Materialize Sticky Example
   body {
    display: flex;
    min-height: 100vh;
    flex-direction: column;
  }

  main {
    flex: 1 0 auto;
  }
|
Materialize Collections
Materialize Collections MaterializeCSS Collections allows us to group list objects together and display them. Almost in every application, we need to display data in lists, the collection provides readymade rich collection with various styles which can be used easily. Here in this tutorial, we are going to explain how you can create Collections in MaterializeCSS Framework. You can use our online editor to edit and run the code online.
Materialize Collections Example- MaterializeCSS
Let us go one by one to understand how collections work with example & demo. There are following types of collections available in Materialize Framework-
- 1. Basic
- 2. Links
- 3. Headers
- 4. Secondary Content
- 5. Avatar Content
- 6. Dismissable Content
Now let us go one by one to understand the materialize collections.
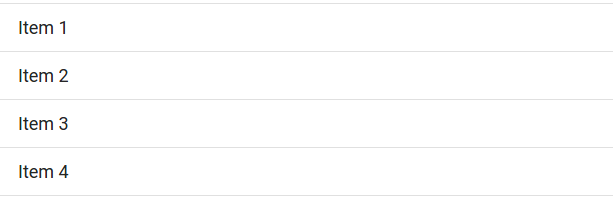
Basic
Add collection class to ul and collection-item class to the list item simply as below –
If you run the above example it will produce the output something like this –
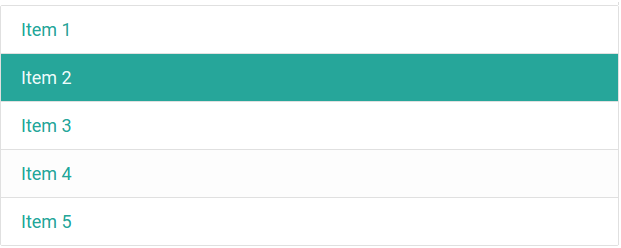
Links
You can create Link Collection simply as below –
If you run the above example it will generate output something like this –
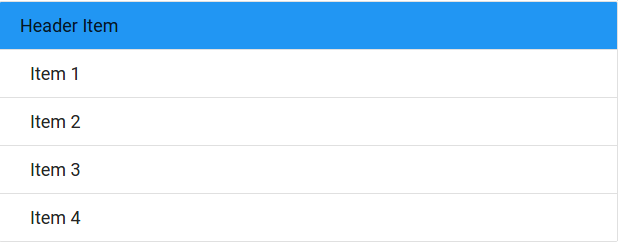
Header
To create Header in Collection add class with-header to ul and collection-header to li simply as below –
If you run the above example it will produce output something like this –
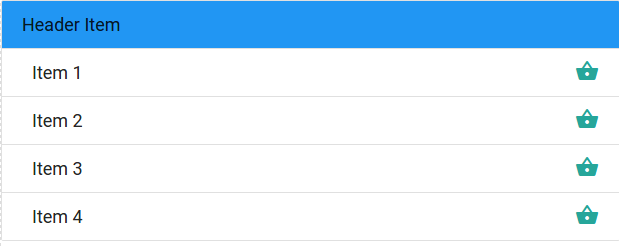
Secondary Content
You can add secondary content simply as below –
Secondary Content With Example
|
If you run the above example it will produce the output something like this –
Avatar Content
Here is an example to create Avatar Content –

The output of the above example will be –
Dismissable Content
You can create Dismissable content just add the class dismissable the items simply as below –
Dismissable Content With Example
|
Learn More
Let us have look over some more important examples.
Bullet List
In Defualt collection bullet points are removed in MaterializeCSS framework still if you need bulleted List you can add your custom class to make it bullet list.
Materialize Chips
Materialize Chips Example: Chips are basically small blocks which are used to represent the small piece of information. Chips are used basically for tags or contacts. Class “chips” is used to define chips. It is very easy to create chips in MaterializeCss framework. Here in this tutorial we are going to explain how you can create chips in Materialize framework. You can also use our online editor to edit and run the code online.
Materialize Chips Example – MaterializeCss
There are basically two types of Chips in MaterializeCss-
- Contacts
- Tags
Contacts
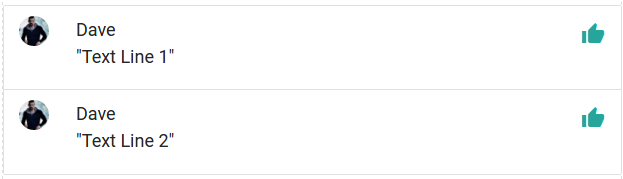
To create contact chip just wrap image by div container and add class “chip” to the div. Here is an example of contact chip-
If you run the above example it will produce the output something like this –
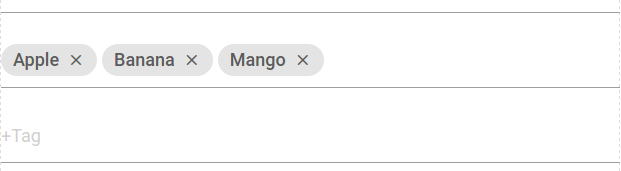
Tags
Create div with class chip add tag name and close icon simply as below –
We can add close button in chips using class close material-icons. When you click on the close icon chip will be automatically closed. If you run the above example it will produce the output something like this –
Learn More
Let us Learn More about the Materialize Chips.
JavaScript Plugin Usage
Let us create dynamic Chips using JavaScript Plugin.
If you run the above example it will produce output something like this –
Options
Following Options are available in jQuery Plugin-
- data(array): You can use this to set the chip data.
- placeholder(string): This is used to show the primary placeholder for Adding tags.
- secondaryPlaceholder(string): This is used to show second placeholder when adding additional tags
- autocompleteData(object): This is used to set the autocomplete data.
- autocompleteLimit(int): You can use this to set the autocomplete Limit.
Events
- chips.add : This method is triggered when a chip is added.
- chips.delete : This method is triggered when a chip is deleted.
- chips.select : This method is triggered when a chip is selected.
Now Let us create example to understand the above events –
Materialize Chips Add Event
Here is an example of add event in Materialize Chips. This event will be called when you add a tag in chip –
Materialize Chips Add Event Example:
     $('.chips').on('chip.add', function(e, chip){
      alert("You Have added chip");
     });
|
Materialize Chips Delete Event
This event will be called when you delete a chip –
Materialize Chips delete tag Event Example:
     $('.chips').on('chip.delete', function(e, chip){
      alert("Do you want to delete this chip");
     });
|
Materialize Chips Select Event
This event will be called when you select a chip –
Materialize Chips select chip | tag Example:
     $('.chips').on('chip.select', function(e, chip){
      alert("You Have Selected chip");
     });
|
Methods
If you want to get the stored data of chip you can use the following method –
Materialize Get Chip Data Example:
var chip_data = $('.chips-initial').material_chip('data');
|


