Vue.Js Event Modifiers
Vue.Js Event Modifiers:–Vue.Js provides us some modifiers which helps us in various ways when we start programming. So today we will see how does they work and what is their liabilies when we put them together with our code. Also we will observe how would these be change the event actions depending upon our requirement on higher level of programming like testing of software development.
Vue.Js Event Modifiers are used in event handling in various programming situations which are used after directive argument by a dot symbol.
Vue.Js Event Modifiers | Example
Their are several event modifiers which are mentioned below and will be described in details. So let you continue your learning from here itself.
The only thing that come in our mind when we start coding is why and when do use this concept. Hence in today’s programming world syntax, working style is keep on changing. So we will teach you in way where you will never any difficulty.
Only the purpose of above lines is that we want to keep our code neat and best in order to understand better. That is why we use some modifier in Vue.Js.
Also modifier provides flexibility to take a control over his program. All possible scenarios will be given in our examples below.
Below we are listing all event modifiers:
Example
<html>
<head>
<script src="https://cdnjs.cloudflare.com/ajax/libs/vue/2.3.0/vue.js"></script>
</head>
<body>
<div id="app">
<input v-model="add" />
  <!--<button v-on="click: onClick">Trigger a handler</button>-->
  <button v-on:click="submit('This is the way to handle DOM event stopPropagation()', $event)">Click Me</button>
  <!--<button v-on:click="counter+=1">{{ counter }} </button>-->
  <button v-on:click="warn('Form cannot be submitted yet.', $event)">
  Submit
</button>
</div>
<script>
  var vm = new Vue({
  el: '#app',
  data: {
  counter:0,
  message: 'Tutorialsplane'
  },
  methods: {

 submit: function (msg, event) {
 event.stopPropagation()
 alert(msg)

  },

 warn: function (message, event) {
    // now we have access to the native event
    if (event) event.preventDefault()
    alert(message)
  }
	  }
})
</script>
</body>
</html>
|
Explanation of Program | Execution
Explanation:– When you use DOM events in your program, Moreover you will address the problem where and how to bind them. Hence so we will not use them inside event handler likewise in below example. Furthermore we will discuss int another example by using them with the help of v-on directive followed by a dot symbol that will change the behaviour of your program.
So consequently modifiers as name suggests are those who change the program’s behaviour.

DOM event stopPropogation() | Example
Sometimes we come across in situation in our program where we need to access and modify the functionality of the program the way we want. Henceforth we take an example below to modify the DOM property named as stopPropogation() which is useful to bubble up an event. As in here we assume you are a little bit familiar with javascript , DOM etc to understand the execution of above program.
Example
<html>
<head>
<script src="https://cdnjs.cloudflare.com/ajax/libs/vue/2.3.0/vue.js"></script>
</head>
<body>
<div id="app">
<div onClick="if(event.stopPropagation){event.stopPropagation();}event.cancelBubble=true;" onclick="alert('you clicked the header')" class="header">
  <span onclick="alert('you clicked inside the header');">something inside the header</span>
</div>
  <!--<button v-on:click="propogate('This is the way to handle DOM event stopPropagation()', $event)">Submit button</button>-->
  <!--<button v-on:click="counter+=1">{{ counter }} </button>-->
  <button v-on:click.prevent="warn('Form cannot be submitted yet.', $event)">
  Submit
</button>
</div>
<script>
  var vm = new Vue({
  el: '#app',
  data: {
  counter:0,
  message: 'Tutorialsplane'
  },
  methods: {

 propogate: function (msg, event) {
 event.stopPropagation()
 alert(msg)

  },

	warn: function (message, event) {
    // now we have access to the native event
    if (event) event.preventDefault()
    alert(message)
  }
  ,
  /*myEventHandler:function (e)
{
    if (!e)
      e = window.event;

    //IE9 & Other Browsers
    if (e.stopPropagation) {
      e.stopPropagation();
    }
    //IE8 and Lower
    else {
      e.cancelBubble = true;
    }
    }*/
    }
})
</script>
</body>
</html>
|
Explanation of Program | Execution
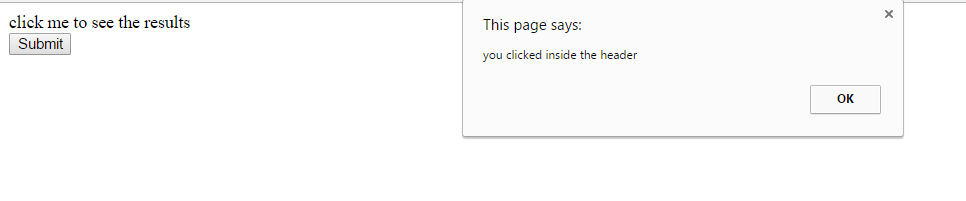
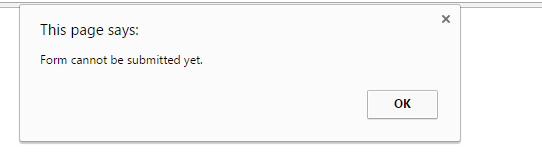
Explanation:– As a consequence we come across the result of the program. Here you can see two outputs attached both collectively. Hence so we got two alert boxes one after another i.e first output ‘ you clicked inside span element’
and the second output is
‘you are inside div element’
that is called when we click on span tag’s content.
So to avoid this bubbling up problem we use following code inside the div tag element. Consequently you will not get undesired alert which falls inside div tag.
Note:–Unfollow the comments line inside the code represented by /**\ or // or
onClick="if(event.stopPropagation){event.stopPropagation();}event.cancelBubble=true;"

Modifier | .self | .capture | Example
This tutorials gives you a brief idea about event ordering. There is a concept of event bubbling in which event handlers handles the event the from child to parent hierarchy. Mean while we will learn how to stop bubbling problem using Vue.Js .self and .capture modifiers.
.self modifier does the same task almost like stopPropogation() DOM event.
Example
<html>
<head>
<script src="https://cdnjs.cloudflare.com/ajax/libs/vue/2.3.0/vue.js"></script>
</head>
<body>
<div id="app">
  <div class="outer" onclick.capture="alert('you are inside first div element')">
<div  onclick.self="alert('you are inside second div element')" class="header">
  <span onclick="alert('you clicked inside span element');">click me to see the results</span><br />
</div>
</div>
  <!--<button v-on:click="propogate('This is the way to handle DOM event stopPropagation()', $event)">Submit button</button>-->
  <!--<button v-on:click="counter+=1">{{ counter }} </button>-->
  <button v-on:click.prevent="warn('Form cannot be submitted yet.', $event)">
  Submit
</button>
</div>
<script>
  var vm = new Vue({
  el: '#app',
  data: {
  counter:0,
  message: 'Tutorialsplane'
  },
  methods: {

 propogate: function (msg, event) {
 event.stopPropagation()
 alert(msg)

  },

	warn: function (message, event) {
    // now we have access to the native event
    if (event) event.preventDefault()
    alert(message)
  }
  ,
  /*myEventHandler:function (e)
{
    if (!e)
      e = window.event;

    //IE9 & Other Browsers
    if (e.stopPropagation) {
      e.stopPropagation();
    }
    //IE8 and Lower
    else {
      e.cancelBubble = true;
    }
    }*/
    }
})
</script>
</body>
</html>
|
Explanation of Program | Execution
Explanation:– In above example we have used both .capture and .self modifiers to restrict event bubbling happening in bottom to top (child-parent)
Key Modifiers | Example
These modifiers are most useful in various situations depending on you program fuctionality. They are most useful in various situation when once you will make your own app which takes control over the keyboard action based events.
All key modifiers are listed as in below table:
Example
Mouse Button Modifiers | Example
These events are eventually take place when a user clicks a mouse button. So depending upon user’s action there are three types of mouse enabled events which can be bind in Vue.Js.
All three button modifiers are listed as in below table:
Example
<html>
<head>
<script src="https://cdnjs.cloudflare.com/ajax/libs/vue/2.3.0/vue.js"></script>
</head>
<body>
<div id="app">
 <button v-on:click.shift="ButtonListener">Click Here</button>
</div>
<script>
  var vm = new Vue({
  el: '#app',
  data: {
  counter:0,
  message: 'Tutorialsplane'
  },
  methods: {
    Listener: function() {
			alert("You clicked the button!");
		},
		ButtonListener: function() {
			alert("You pressed the Shift + Enter key!");
		},
         }
})
</script>
</body>
</html>
|

Advertisements


